在Photoshop(PS)中制作唯美光斑效果,是一种增添照片艺术感和梦幻氛围的常用技巧。这种效果通常在照片中创建一种柔和、散射的光线效果,给画面带来一种温馨、浪漫的触感。首先,选择合适的照片,最好是那些有一定光源和较暗背景的图片,这样光斑效果更为明显和自然。打开PS后,新建一个图层,并在此图层上应用“渲染”中的“镜头光晕”效果,这是创造光斑的主要工具。
在调整镜头光晕时,可以根据照片的具体内容和所需氛围调节光晕的大小、亮度和颜色。例如,增加亮度和大小可以使光斑更为突出,而调整颜色则可以使光斑与照片的整体色调协调。此外,还可以通过“高斯模糊”等滤镜进一步处理光斑,使其更加柔和、自然。通过这些步骤,就可以在PS中制作出唯美、梦幻的光斑效果,为照片增添一抹艺术魅力。


ps制作唯美的光斑效果人像图方法步骤
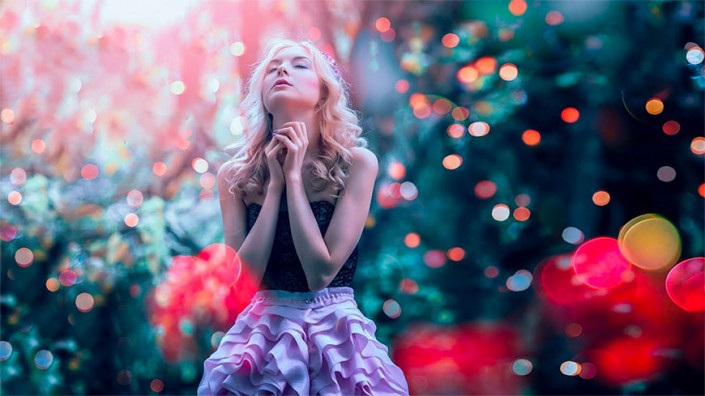
效果图:
操作步骤:
打开女孩素材图

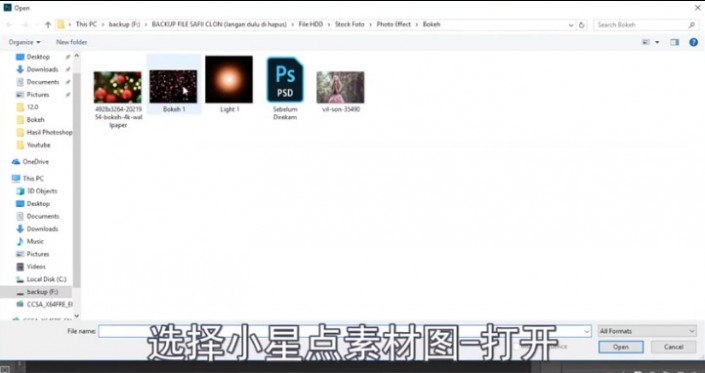
选择小星点素材图-打开
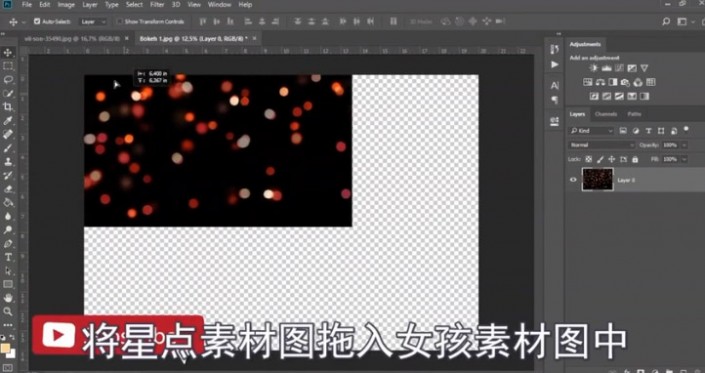
将星点素林图拖入女孩素材图中
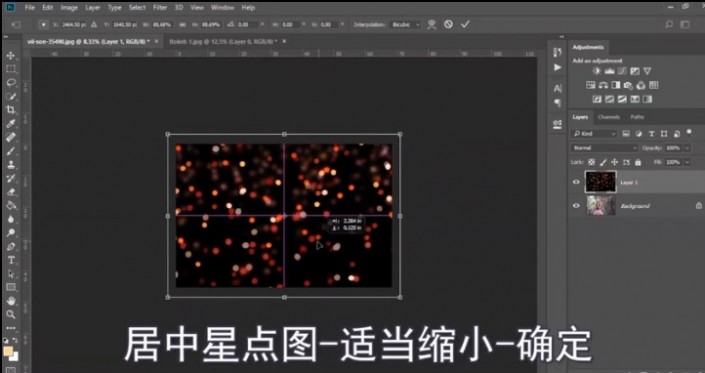
居中星点图—适当缩小—确定
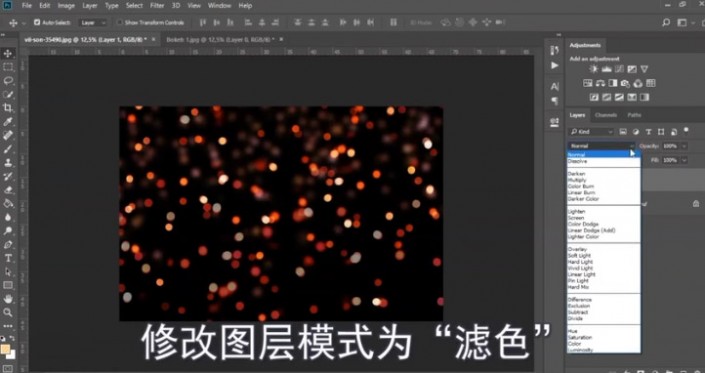
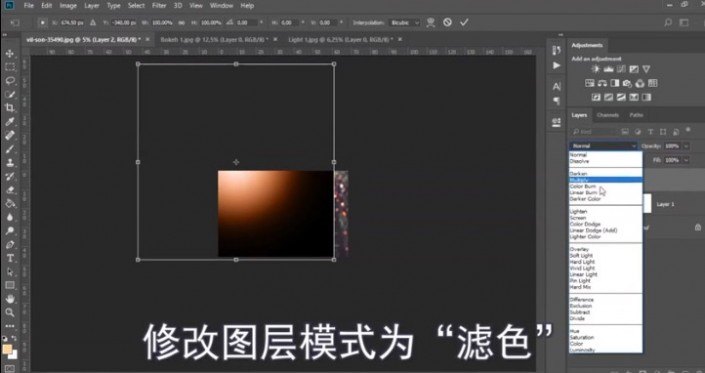
修改图层模式为“滤色”
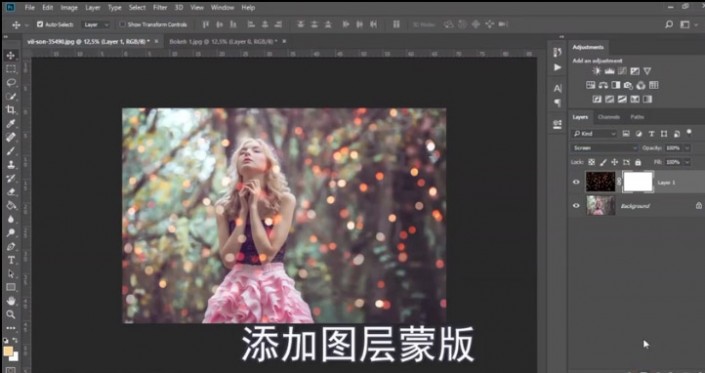
添加图层蒙版
选择图层蒙版—B画笔工具
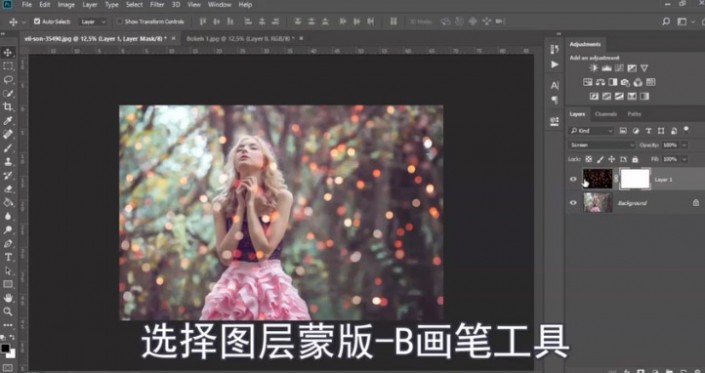
选择笔刷为柔边圆

(涂抹白色显示图层,涂抹黑色擦除图层)选择前景色为黑色

用画笔涂抹去掉人物上的星点

选择光素材图—打开

修改图层模式为“滤色”
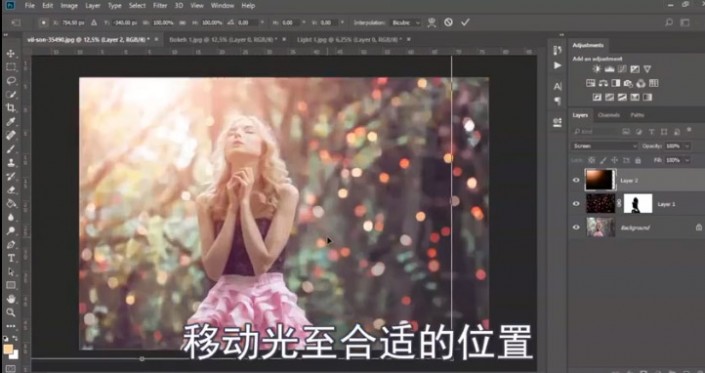
移动光至合适的位置
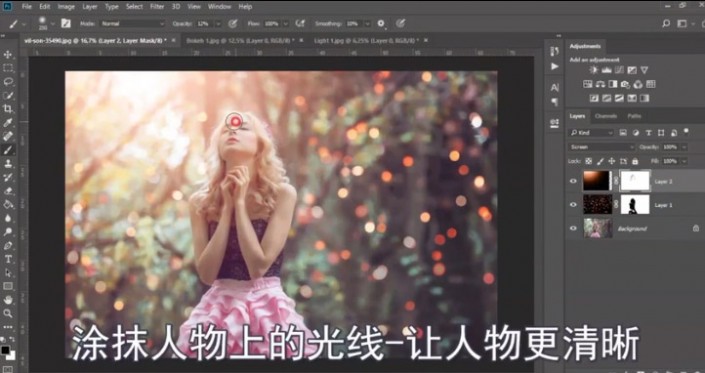
选择光素材图层—添加图层蒙版

B画笔工具

涂抹人物上的光线让人物更清晰
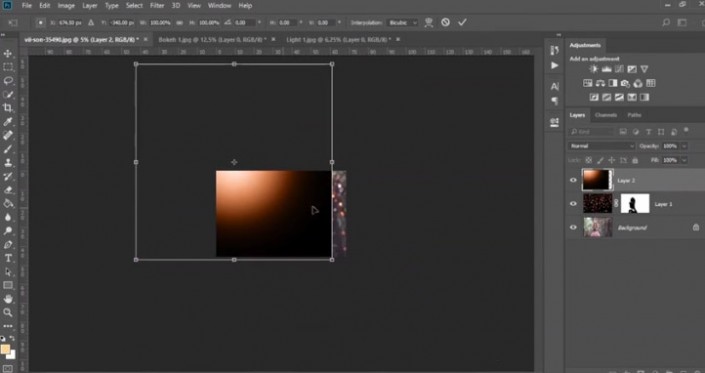
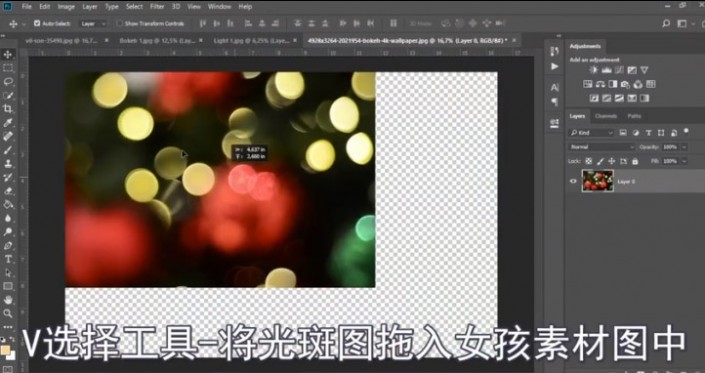
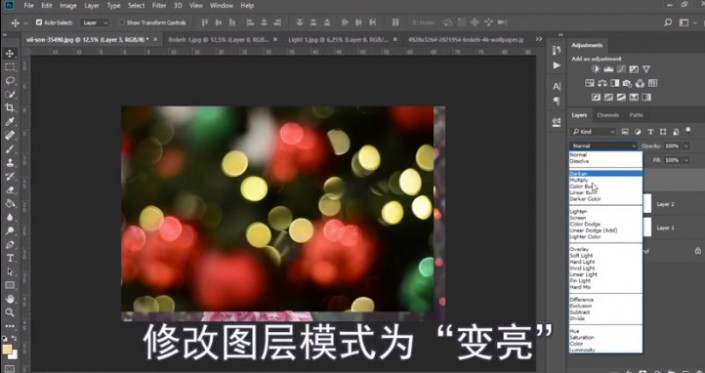
文件一打开,选择光斑图—打开

V选择工具—将光斑图拖入女孩素材图中
修改图层模式为“变亮"
适当移动位置—右键—水平翻转

将光斑调至合适的大小和位置

选择光斑图—添加图层蒙版

B画笔工具—选择柔边圆笔刷
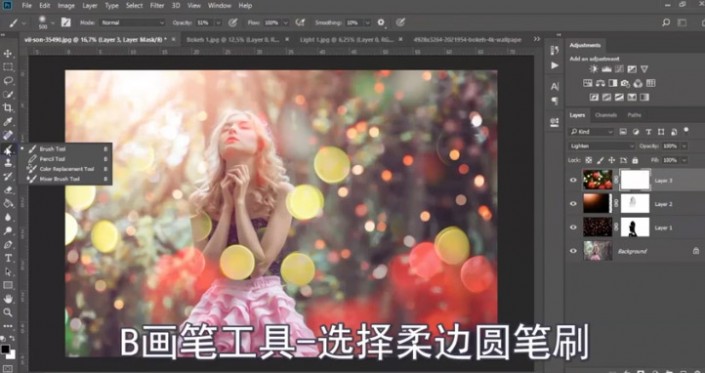
涂抹画面上的光斑

调整图层—颜色查找
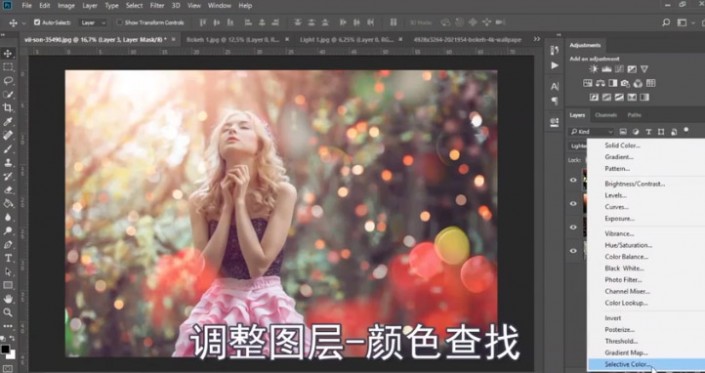
HonrorBlue 3DL

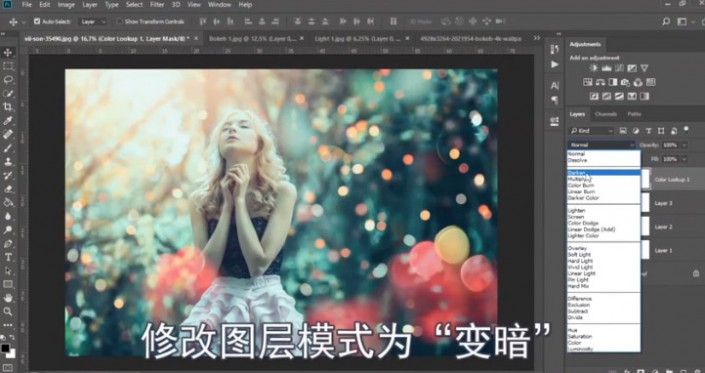
修改图层模式为“变暗”
选择最上图层

按住Shift键-选择最下图层
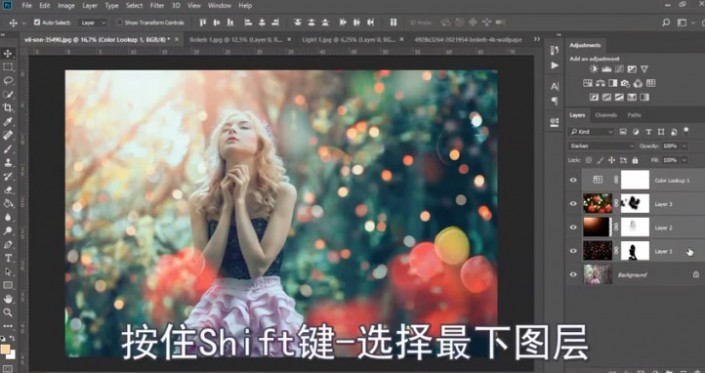
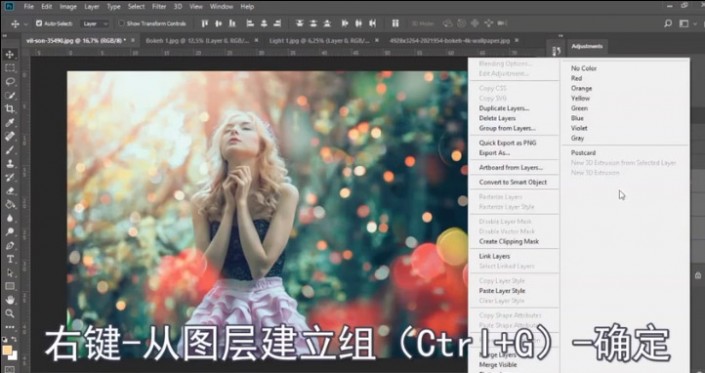
右键—从图层建立组(CtrI+G)—确定
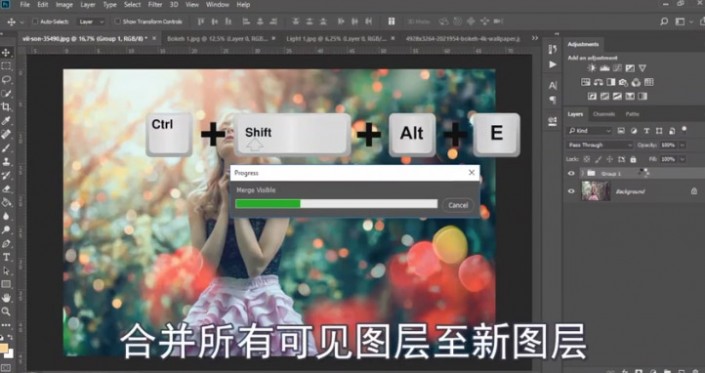
合并所有可见图层至新图层
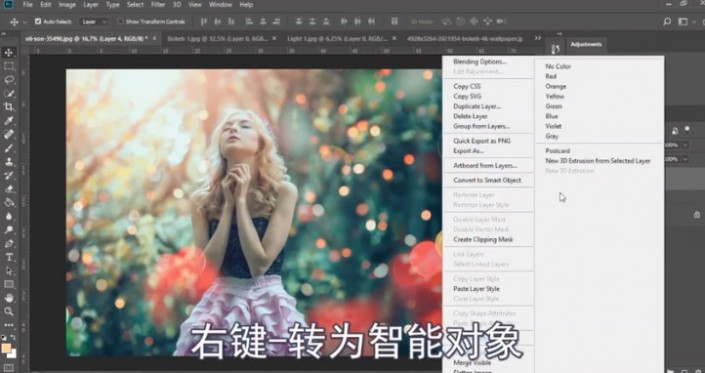
选择合并的新图层

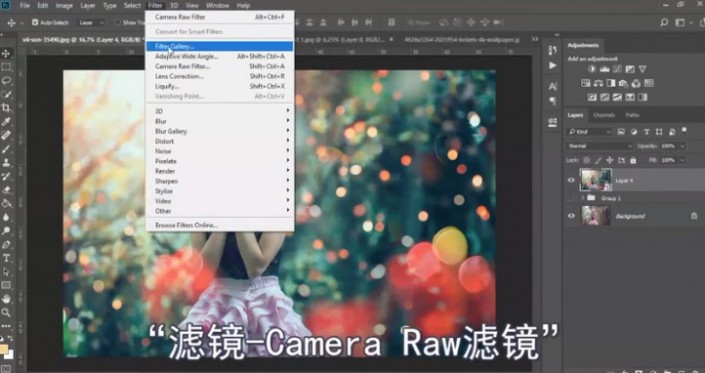
右键-转为智能对象
“滤镜—Camera Raw滤镜"
‘’高光压暗—阴影加重—白色提亮”

高光压暗—阴影加重一白色提亮

(可根据实时画面调整颜色)

(根据画面整体色调适当调节)高光色调至紫红色

曝光降低-对比度增加

完成:
制作起来也比较简单,同学们可以通过教程来练习一下,相信你可以做的更好。