在数字图像编辑和设计领域,Adobe Photoshop(简称PS)的功能非常强大,可以实现各种独特且创新的设计效果。其中,古风科技效果是一种结合了传统元素与现代科技的艺术表达方式,这种方式不仅融合了两者的优点,而且还可以带来全新的视觉体验。要想实现古风科技效果,你需要扎实的基础技能,比如理解并应用层次、混合模式、滤镜和纹理等工具。
另外,为了塑造出完美的古风氛围,你还应该对中国古文化及其美学有一定程度的了解。在设计过程中,既要保留古典元素的唯美和神秘感,又要巧妙地添加科技元素,使作品显得时尚且富有创意。本文将详细介绍如何在Photoshop中创造出引人入胜的古风科技效果。
ps制作古风科幻同在的神秘刀客方法步骤
效果图:
![](https://img.jiaochengzhijia.com/uploadfile/2023/1108/20231108181119487.jpg)
操作步骤:
1、新建文档。
![](https://img.jiaochengzhijia.com/uploadfile/2023/1108/20231108181119179.jpg)
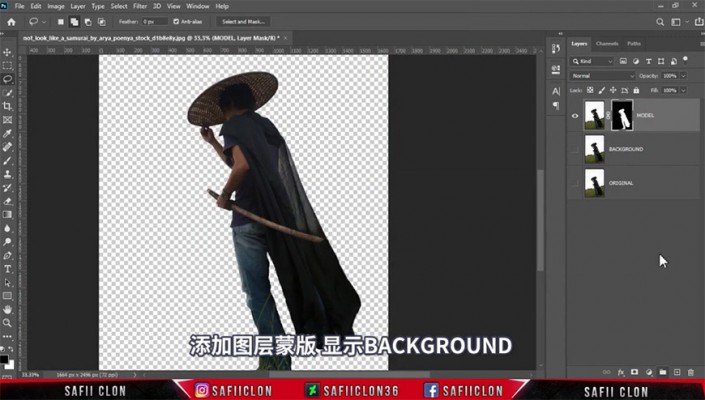
2、用快速选择工具及套索工具将人物部分抠出。
![](https://img.jiaochengzhijia.com/uploadfile/2023/1108/20231108181119557.jpg)
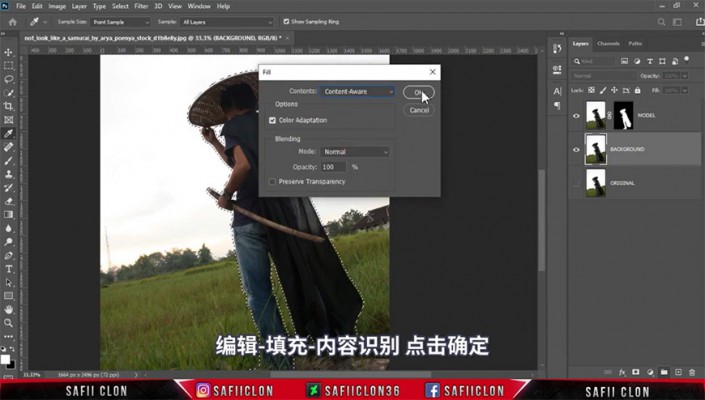
3、创建蒙版选区,选择背景图层,扩展选区后使用内容识别填充。
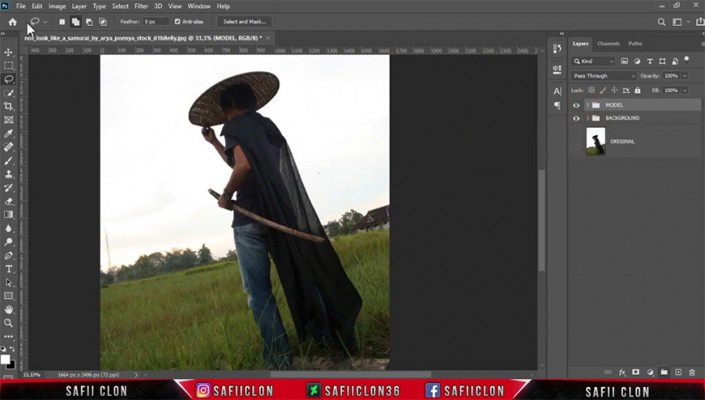
![](https://img.jiaochengzhijia.com/uploadfile/2023/1108/20231108181120751.jpg)
![](https://img.jiaochengzhijia.com/uploadfile/2023/1108/20231108181120462.jpg)
4、将背景及人物分别编组。
![](https://img.jiaochengzhijia.com/uploadfile/2023/1108/20231108181120541.jpg)
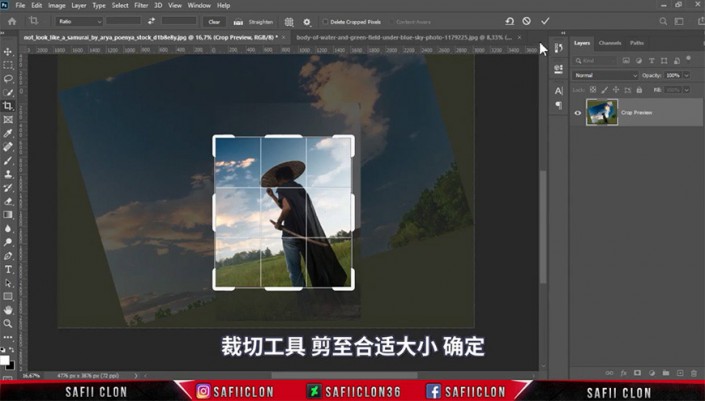
5、打开天空素材,框选需要的部分拖入到文档,调整大小位置等。
![](https://img.jiaochengzhijia.com/uploadfile/2023/1108/20231108181120802.jpg)
![](https://img.jiaochengzhijia.com/uploadfile/2023/1108/20231108181120663.jpg)
6、新建纯色层,裁剪图片。
![](https://img.jiaochengzhijia.com/uploadfile/2023/1108/20231108181121556.jpg)
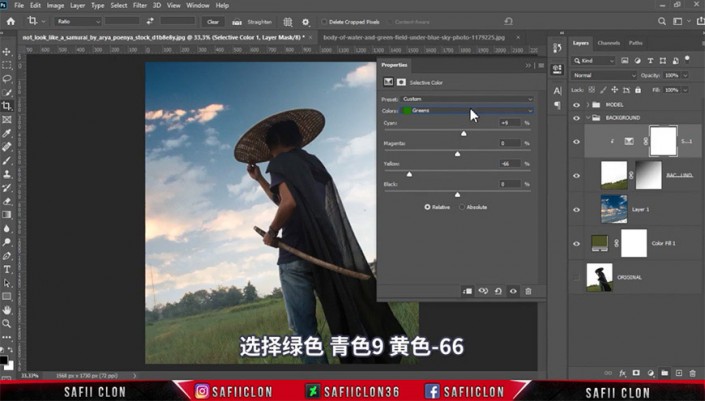
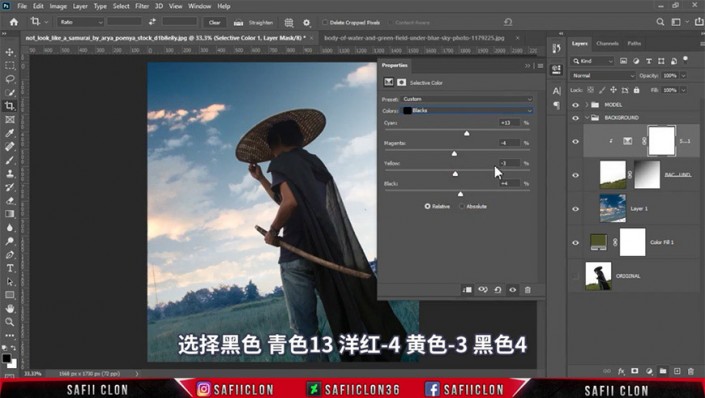
、新建可选颜色、色阶调整图层剪切至背景,在蒙版上进行调整。
![](https://img.jiaochengzhijia.com/uploadfile/2023/1108/20231108181121767.jpg)
![](https://img.jiaochengzhijia.com/uploadfile/2023/1108/20231108181121290.jpg)
![](https://img.jiaochengzhijia.com/uploadfile/2023/1108/20231108181121180.jpg)
![](https://img.jiaochengzhijia.com/uploadfile/2023/1108/20231108181121364.jpg)
8、新建两个图层,分别调整图层模式,用画笔画出亮光。
![](https://img.jiaochengzhijia.com/uploadfile/2023/1108/20231108181122743.jpg)
![](https://img.jiaochengzhijia.com/uploadfile/2023/1108/20231108181122357.jpg)
9、右键人物图层蒙版,用选择并遮住调整蒙版。
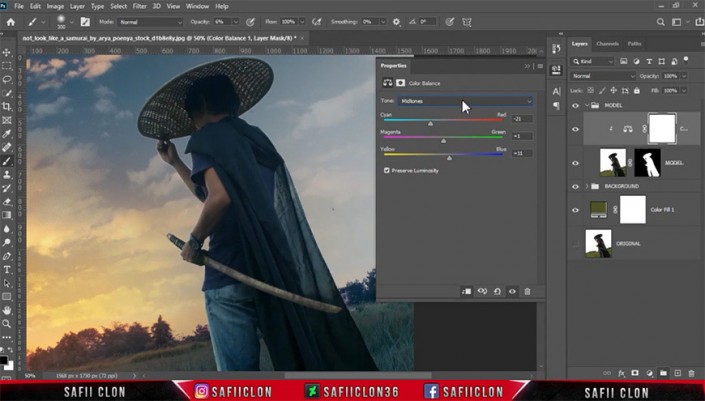
![](https://img.jiaochengzhijia.com/uploadfile/2023/1108/20231108181122643.jpg)
10、新建色彩平衡调整图层剪切至人物。
![](https://img.jiaochengzhijia.com/uploadfile/2023/1108/20231108181122117.jpg)
11、新建中性灰图层剪切至人物图层,模式改为柔光,用加深减淡工具给人物制作亮暗部。
![](https://img.jiaochengzhijia.com/uploadfile/2023/1108/20231108181122631.jpg)
12、新建图层剪切至人物,调整图层模式,用画笔涂抹出环境色,复制一层修改图层模式及不透明度。
![](https://img.jiaochengzhijia.com/uploadfile/2023/1108/20231108181123938.jpg)
![](https://img.jiaochengzhijia.com/uploadfile/2023/1108/20231108181123324.jpg)
13、新建图层,用画笔涂抹背光部分,调整填充。
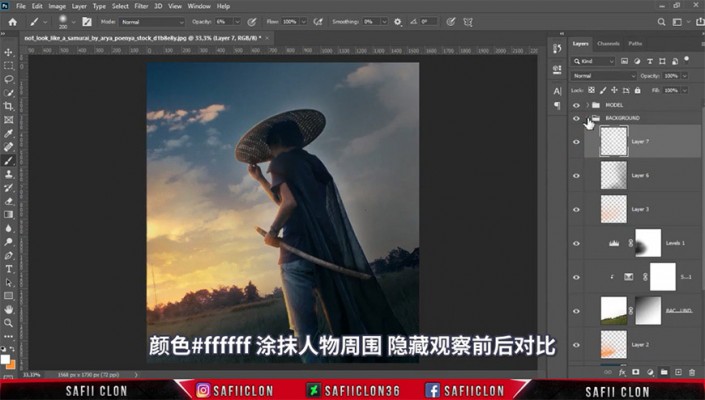
![](https://img.jiaochengzhijia.com/uploadfile/2023/1108/20231108181123727.jpg)
14、新建图层,用画笔涂抹人物周围。
![](https://img.jiaochengzhijia.com/uploadfile/2023/1108/20231108181123260.jpg)
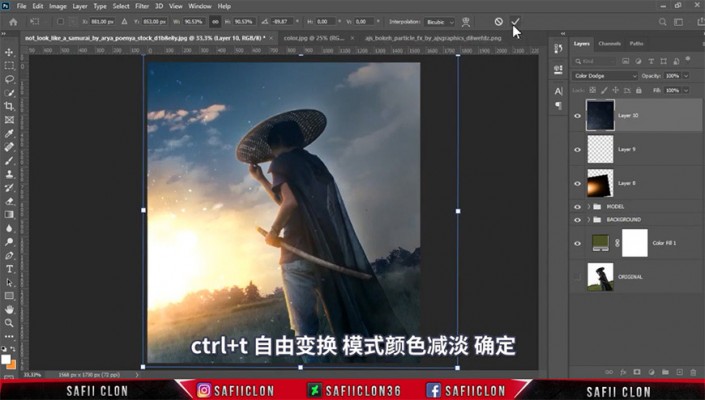
15、导入太阳素材,调整大小位置及图层模式。
![](https://img.jiaochengzhijia.com/uploadfile/2023/1108/20231108181123439.jpg)
16、新建图层,用画笔拍出烟雾效果并调整不透明度。
![](https://img.jiaochengzhijia.com/uploadfile/2023/1108/20231108181124237.jpg)
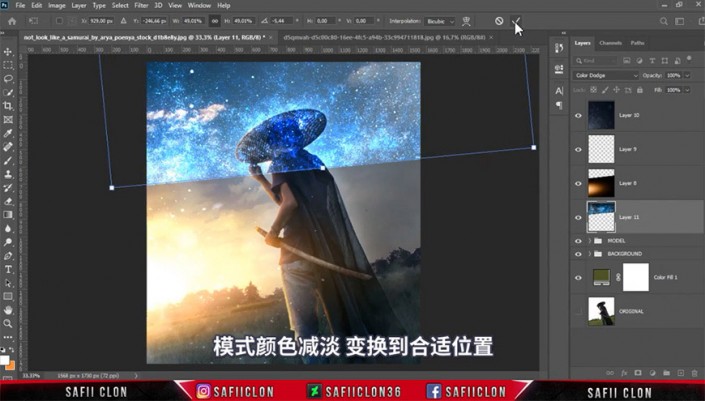
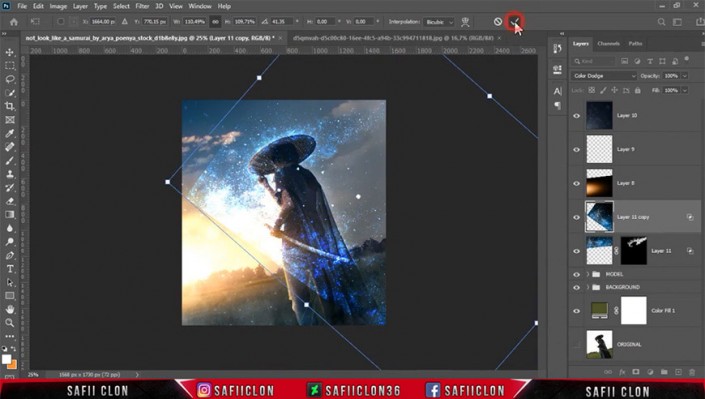
17、导入纹理素材,调整大小位置及图层模式,调整混合选项并添加蒙版进行涂抹。复制蓝色纹理层,删除蒙版调整大小位置,重新添加蒙版进行涂抹。
![](https://img.jiaochengzhijia.com/uploadfile/2023/1108/20231108181124644.jpg)
![](https://img.jiaochengzhijia.com/uploadfile/2023/1108/20231108181124973.jpg)
![](https://img.jiaochengzhijia.com/uploadfile/2023/1108/20231108181124223.jpg)
![](https://img.jiaochengzhijia.com/uploadfile/2023/1108/20231108181124608.jpg)
![](https://img.jiaochengzhijia.com/uploadfile/2023/1108/20231108181125292.jpg)
![](https://img.jiaochengzhijia.com/uploadfile/2023/1108/20231108181125774.jpg)
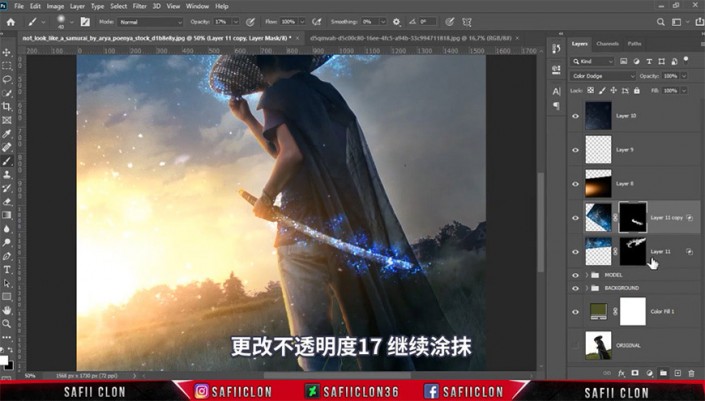
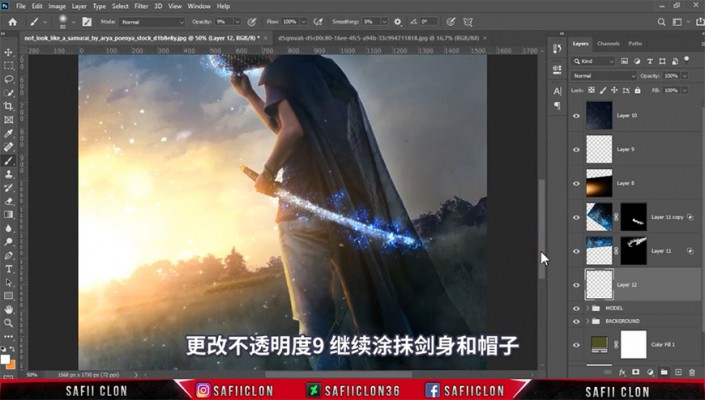
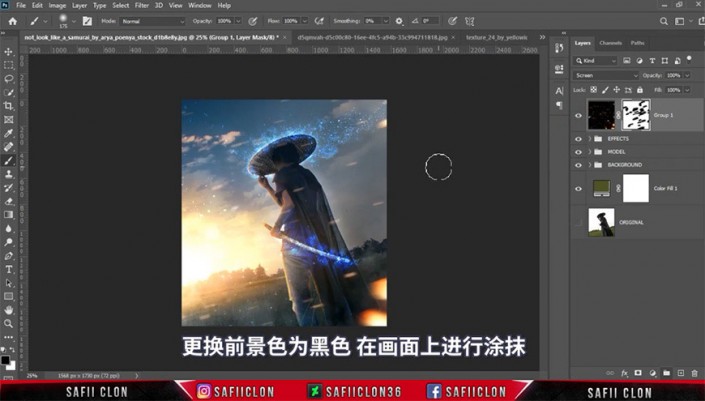
18、新建图层,调整图层模式,用画笔涂抹剑身及帽子部分。新建图层,调整图层模式,继续用画笔涂抹。
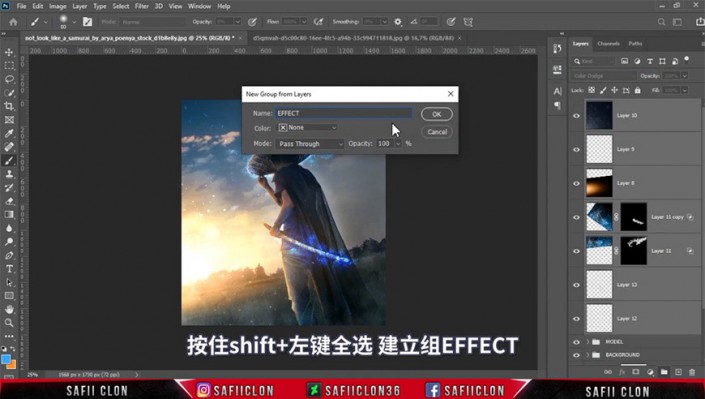
![](https://img.jiaochengzhijia.com/uploadfile/2023/1108/20231108181125448.jpg)
![](https://img.jiaochengzhijia.com/uploadfile/2023/1108/20231108181125679.jpg)
19、将所有调整层进行编组。
![](https://img.jiaochengzhijia.com/uploadfile/2023/1108/20231108181126854.jpg)
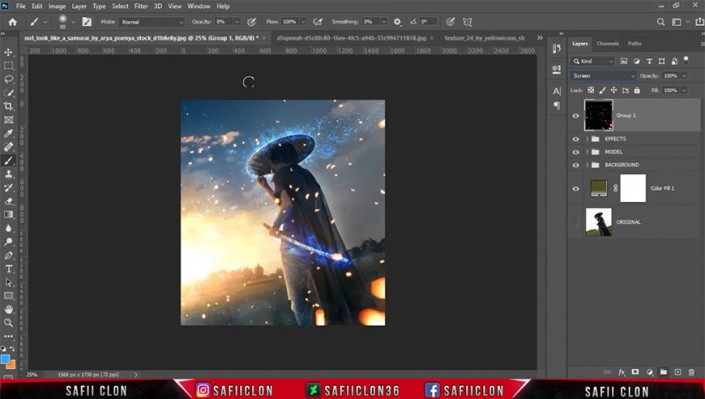
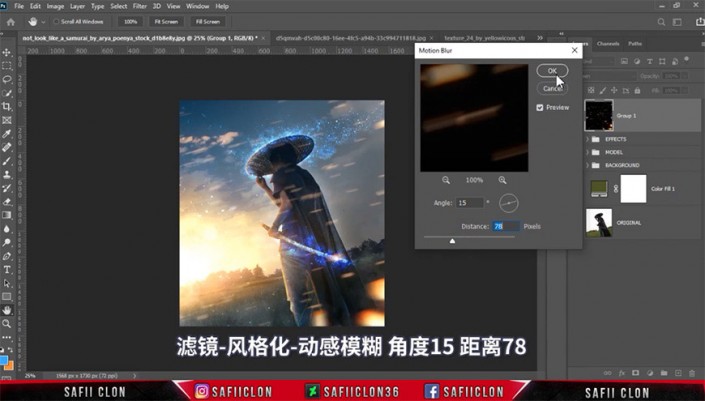
20、导入光斑素材 ,调整大小位置及图层模式,复制一层光斑进行调整。将两个光斑层编组,合并组,调整图层模式并添加动感模糊,创建蒙版进行涂抹。
![](https://img.jiaochengzhijia.com/uploadfile/2023/1108/20231108181126906.jpg)
![](https://img.jiaochengzhijia.com/uploadfile/2023/1108/20231108181126431.jpg)
![](https://img.jiaochengzhijia.com/uploadfile/2023/1108/20231108181126316.jpg)
![](https://img.jiaochengzhijia.com/uploadfile/2023/1108/20231108181126447.jpg)
![](https://img.jiaochengzhijia.com/uploadfile/2023/1108/20231108181127233.jpg)
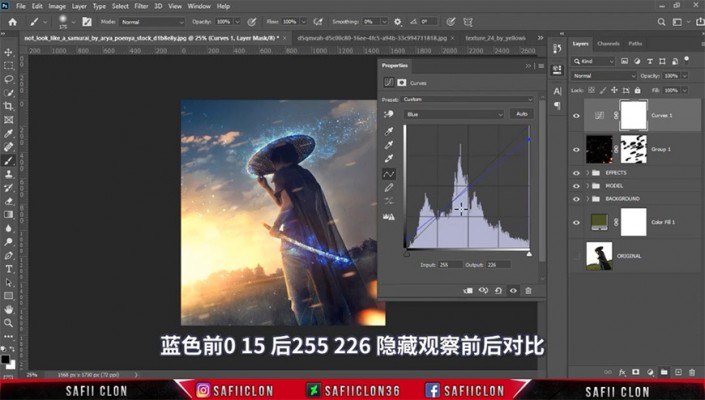
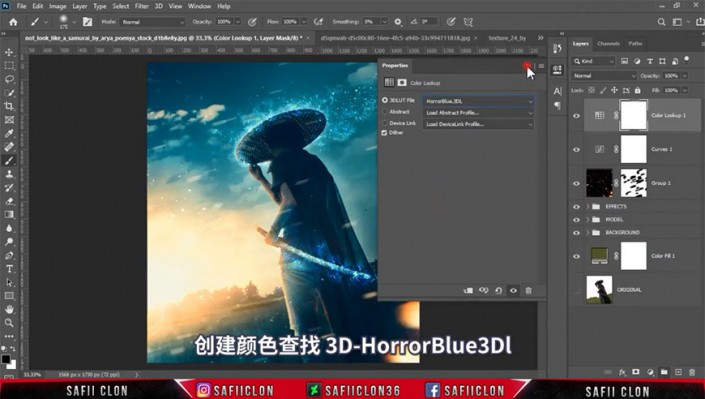
21、添加曲线、颜色查找调整图层,调整图层模式及填充。
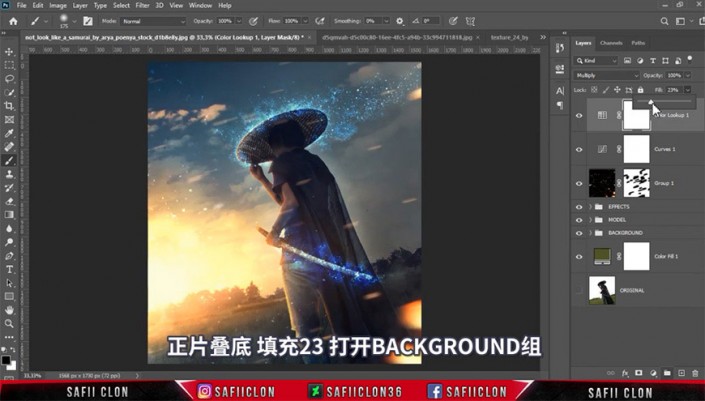
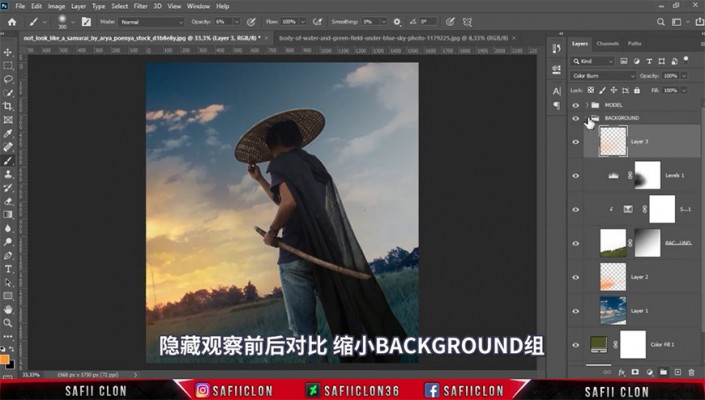
![](https://img.jiaochengzhijia.com/uploadfile/2023/1108/20231108181127879.jpg)
![](https://img.jiaochengzhijia.com/uploadfile/2023/1108/20231108181127903.jpg)
![](https://img.jiaochengzhijia.com/uploadfile/2023/1108/20231108181127900.jpg)
22、调整背景图层的蒙版。
![](https://img.jiaochengzhijia.com/uploadfile/2023/1108/20231108181127170.jpg)
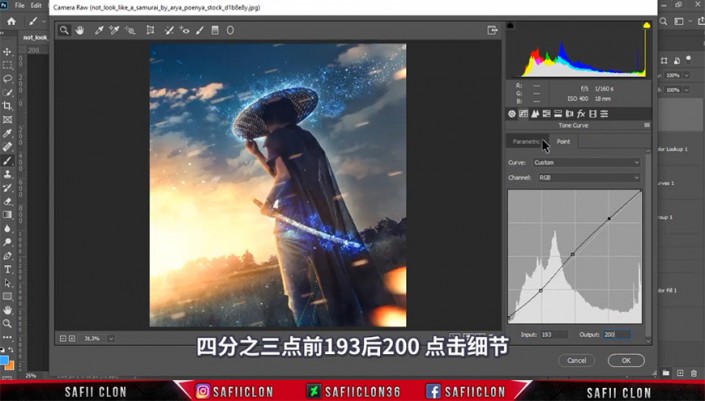
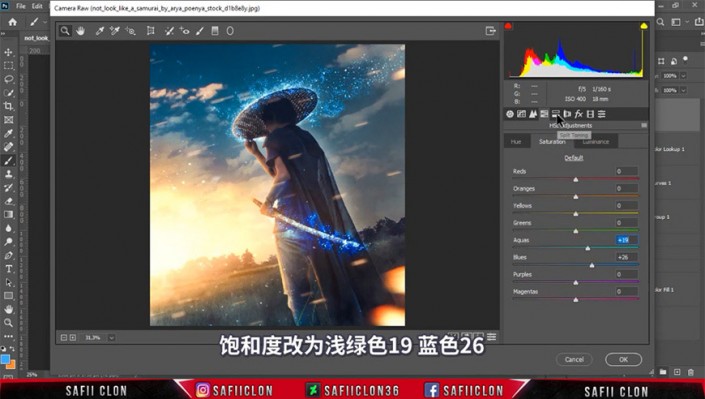
23、盖印所有图层并命名,添加camera raw滤镜。
![](https://img.jiaochengzhijia.com/uploadfile/2023/1108/20231108181128984.jpg)
![](https://img.jiaochengzhijia.com/uploadfile/2023/1108/20231108181128265.jpg)
![](https://img.jiaochengzhijia.com/uploadfile/2023/1108/20231108181128814.jpg)
![](https://img.jiaochengzhijia.com/uploadfile/2023/1108/20231108181128341.jpg)
![](https://img.jiaochengzhijia.com/uploadfile/2023/1108/20231108181128808.jpg)
24、添加nik滤镜。
![](https://img.jiaochengzhijia.com/uploadfile/2023/1108/20231108181129831.jpg)
![](https://img.jiaochengzhijia.com/uploadfile/2023/1108/20231108181129873.jpg)
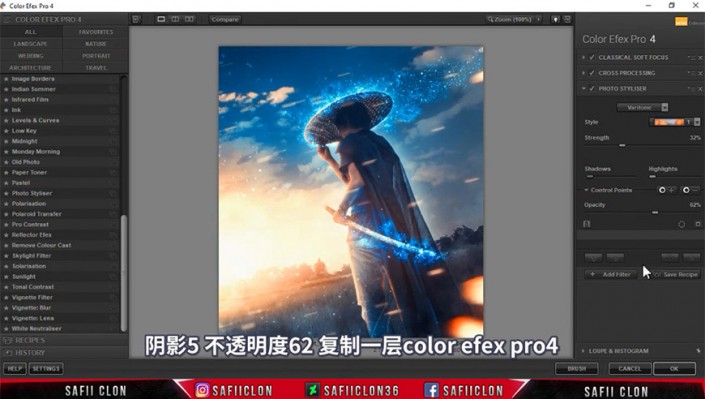
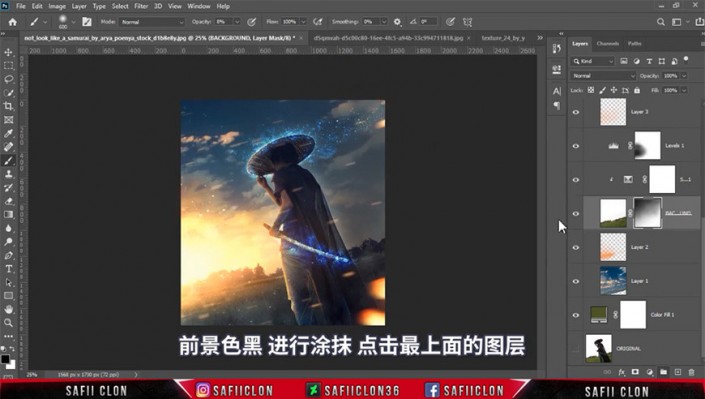
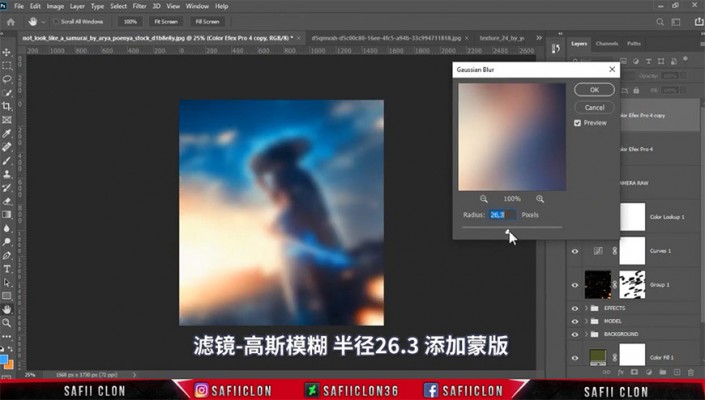
25、复制一层nik滤镜层,添加高斯模糊,添加蒙版进行调整。
![](https://img.jiaochengzhijia.com/uploadfile/2023/1108/20231108181129747.jpg)
![](https://img.jiaochengzhijia.com/uploadfile/2023/1108/20231108181129155.jpg)
26、将所有调整层进行编组并盖印调整层,修改图层模式并添加高反差保留。
![](https://img.jiaochengzhijia.com/uploadfile/2023/1108/20231108181130600.jpg)
完成:
![](https://img.jiaochengzhijia.com/uploadfile/2023/1108/20231108181119487.jpg)
一起来学习一下吧,相信你可以通过教程直走的更好,比较具有科幻感,也可以通过教程制作更有创意的作品。