已经安装了win11安卓子系统的小伙伴(没安装装请看win11安卓子系统安装步骤),在计算机上体验一把不一样的操作感觉,岂不美哉。接下来我为大家分享win11安卓子系统安装步骤,我们一起来看看吧。
工具/原料
系统版本:win11
品牌型号:联想
方法/步骤:
步骤一:我们首先下载安装好需要的文件。
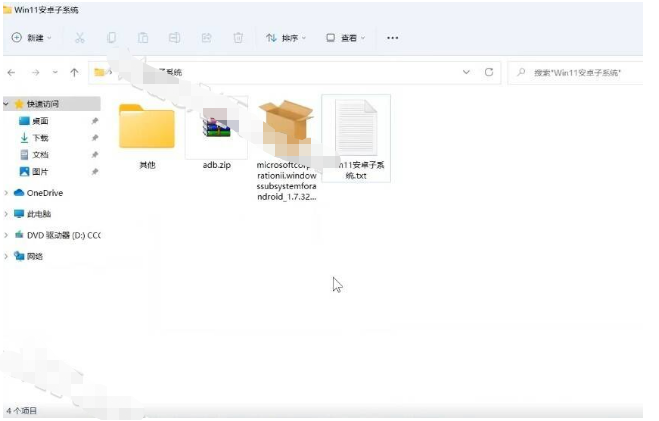
步骤二:接着打开电脑记事本文档,复制add-appxpackage即可。

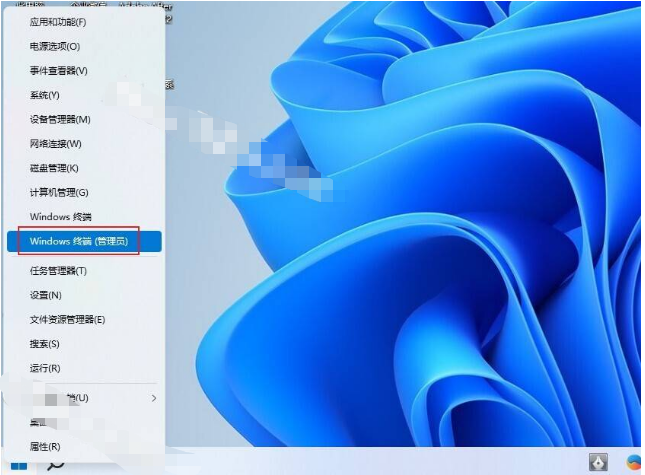
步骤三:然后在win11的开始菜单单击右键,点击 Windows 终端(管理员)即可。
步骤四:屏幕页面上 Windows 终端中按 Ctrl + V 粘贴之前复制的地址然后空格即可。

步骤五:返回安装包复制的地址,如图。

步骤六:然后粘贴到Windows 终端中,按回车键即可。

步骤七:假如安装过程中出现下列错误。

步骤八:然后打开文件夹中的其余文件夹,安装下列图片中的的两个程序。

步骤九:win11安卓子系统安装完成后,重复操作上面一次步骤,出现下列页面,就说明安装成功啦。

总结:
上述就是我为你们带来的win11安卓子系统安装步骤啦,希望对你们有所帮助。